another yule cardi done by Katherine Hajer

I finished the Yule cardigan for Niece the Younger last weekend. It's a combination of two different patterns (the cardigan and the panda chart) from the same Family Circle Knitting book that Jackie gave me, with the only mod being that I made full-length sleeves instead of three-quarters (because who wants to see a three-year-old with cold forearms?).

Pandas are Niece the Younger's absolute favourite animal. She has several panda dolls, and we have to stop and look at Telus ads with pandas in them if she spots one.

I thought I was going to do the cardigan in pink to match the other 90% of the nieces' wardrobes, but Niece the Younger informed me her favourite colour is "blue!", and so I bought the yarn while she was around to approve it.

The cardigan and the white of the panda are done in King Cole Baby DK, while the black is left over from the tiger jacket I made Niece the Elder a couple of years ago.

I like the cardigan's shape, and the shirt-style collar. I always picture Niece the Younger in 1960s-style clothes, but she's been very particular about dressing herself since she was two. I hope this cardigan makes it into the repetoire!

Meanwhile, I had a start-everything frenzy in the second half of the weekend.

First, I discovered a Nicky Epstein free pattern for an empire-waisted swing jacket. I'm not going to link to it until I have some photos of my own version done, but basically I'm doing the bodice as shown, and then changing the sleeve length (to long sleeves again — what's with giving loose, swingy wool jackets short sleeves?). I'm also changing the collar stitch and colour, but keeping its shape. Right now there's no photo because it just looks like a swath of green heathered yarn. More on that when it's recognisable.

Some projects, on the other hand, need to be photographed when they're not recognisable. Here's the other jacket I started last weekend:

Yes, that's a jacket, all three rows of 609 stitches each of it. I had it distributed over four circular needles so I could ensure the fabric wasn't twisted before I joined it for knitting in the round (that just happened a minute before I took this photo). It's going to be a swirl jacket. This is the second attempt — the first time, I added a half-twist the first time I worked it in the round to "fix" a twist that wasn't actually there, so I had to rip it all out and start again. This too is part of the process. The good news is I have now made it to the part of the pattern where I get to start decreasing. After the current round is completed, I'll be down to only 592 stitches! You have to take your victories where you can find them.

strawberry steampunk: halfway by Katherine Hajer

Yesterday I got to 47 hexagons done on the Strawberry Steampunk blanket — just over the halfway point towards the goal of 87 hexagons. I laid out what I had on the floor, guessing the gap to take the joining border into account, and it looked like this:

What I learned was:

  • The blanket will work as a shawl at this width, but not as a... blanket. If I can squeeze 10 more motifs out of the stash yarn, I really should.
  • I don't like the half-motif "notches" every other row, so I'm going to have to fill them in with half-hexes. Since it's going to take all the stash yarn I have to complete the motifs, probably these will be from the joining border (charcoal) yarn.
  • I like the different shades of pink! I think the variation will give it the antique look I was going for, and will be more interesting than if just three colours were used. Sometimes not having quite enough in one colour is a good thing.

I'm still aiming to get 10 motifs done per week, more if I can manage it.

serendipitous stash-busting by Katherine Hajer

One of my goals for this year was to use up the rest of the stash yarn I got when I was birthday yarn-bombed. I weighed the yarn, estimated the yardage (no ball band, so I'm not 100% sure what it is besides worsted acrylic), and decided there was enough there for something for Niece the Elder. She's 5 and likes anything "rainbow", so I knitted up a square and showed it to her. She said she Yes! she liked it, and Yes! she would like me to make something for Yule for her with it. I showed her a picture of the Flower Cardigan that J-A recommended to me, and Yes! Niece the Elder liked that too.

I must have caught her in a good mood. Still, I have buy-in for the present, and that's important. I don't like to work for hours and hours on something and then spring it on someone without being very certain they will like it.

The cardigan starts in the centre of that flower motif you can see in the photo above, and then expands from that point to create a raglan, cutaway cardigan. I don't have buttons for it yet, but here's the front:

This took me almost exactly two weeks to knit. Most of the discussion on Ravelry has praised the directions. Personally I found them a little overwritten, but that's the trend these days. I skipped some sections and just did what I thought made sense, and 90% of the time that's what the directions said to do anyhow — when they didn't, such as the button band/lower border rib, you can't tell I altered anything. The biggest alteration was that I was using worsted weight instead of the stipulated DK, so I made a size 4 in order to get size 6 results. I just followed the size 4 stitch counts and the size 6 measurements, and it all worked out.

There's an adult version available, which will be tempting to do at some point.

Best of all, it used up almost all the yarn!

stacked hexagons by Katherine Hajer

I've been crocheting at least one Paperweight Granny/African flower a day since my last post about them. The photo above shows the lot — 24 completely done, plus 4 more that just need the ends darned in. If I've calculated my measurements right, I'll need at least 87 before I can think about joining.

The rule I've made is crochet 4, darn them all in, crochet some more. There are 6 ends per motif, which may seem like a lot, but the truth is the structure of the motif makes them very quick and easy to finish off. The one situation I do not want to wind up in is having me crying about "all those ends" when a little prudence can save a lot of angst.

Speaking of avoiding angst, I lucked out on Pinterest last night and found a fabulous tutorial about how to join hexagonal motifs in one continuous run — for the entire piece, not just a row or cluster at a time! I tried it last night on a few finished motifs, just to see if I understood the instructions, and it's remarkably easy once you get going. I unravelled the results because I'm not ready to join yet, but I am definitely using this for the assembly.

The only caveat is that the hexagons have to have the same colour on the last round to use the continuous join. Fair enough, given how it works. If you aren't using the same colour, there are other join-as-you-go options to choose from anyhow.

strawberry steampunk... and a sock by Katherine Hajer

Earlier this spring, I had an idea to use up some of the acrylic worsted I inherited from my grandmother, and make an afghan. Afghans themselves can be rather boring unless there's an interesting angle to them, and after some consideration I decided to try to make this one fit the steampunk aesthetic. Okay, mostly because I had a big skein of burgundy to use up, but hey, inspiration comes from everywhere.

I found a suitable spiky/gearsy block to make, and started off...

...only to figure out I really hated making this block. The grey-purple "floating" shells involve several two-colour rounds with some awkward hook manoeuvres, and produce elements which look like they need to be scraped off and checked under a microscope. The block itself took forever to do. Blech.

Lately there's been a lot of buzz around the African Flower/Paperweight Granny motif. I liked the look of it, and especially liked that you can hook up one in only four rounds (not counting the joining border). So I tried a bunch of different combinations, based on how much yarn I had in each colour:

Much better, in my humble opinion, and the long stitches on the final round still give it that gear effect when worked in these colours. (It seems like the big trend is to work it in bright, clear colours, which I am so not doing. Oh well. Still works.)

I joined some blocks together, just to get a sample big enough to calculate the final afghan size:

I like how the final round of the motif shows up when it's edged by the joining border.

If I've done the calculations right, I'll need 87 blocks to make a 45x150cm afghan. I'd like it to be more like 170cm, but I'll have to see how far I get before I run out of yarn.

Meanwhile, the socks I started before the Iceland trip are back in active rotation:

It'll be nice to get these done — this is still only the first sock.

It'll be nice to get everything done.

an act of spontaneous millinery by Katherine Hajer

The last few rows of the souvenir Icelandic shawl were hard to get through. Each row was taking upwards of fifteen minutes to complete.

Last Saturday my youngest brother had the family over for lunch, and I didn't want to be mucking with hundreds of stitches, on a streetcar, in a heat wave. So instead I crocheted a hat:

The pattern is the Zelda cloche from the Spring 2014 issue of Interweave Crochet. The hat is worked sideways, instead of the usual bottom-up or top-down, and it actually fits very well (see the previous link for a photo of a model wearing it).

The lace motif is only on one side, although it wouldn't take much to make it symmetrical and on both sides. The total working time was only something like four hours, which is pretty good considering over two-thirds of it is rows of single crochet.

As for the yarn... it's left over from a shawl I made my mum last year. It used up just over the half the yarn I had left, and was a good reminder that sometimes stash-busting happens one small item at a time. With the grey yarn left over from the Icelandic shawl, I'll have a new hat/scarf/glove set.

memories are made of this by Katherine Hajer

My challenge for this month's #craftblogclub: finish the Margrét shawl (pattern: Icelandic Handknits by Héléne Magnússon). It was a DIY souvenir from my trip to Iceland. I only started it at the end of May, but I knew that if I didn't work steadily at it, I'd give up and let it sit.

In the middle of May nothing was started yet:

Last night I did the last few rows and cast off. This morning I washed and blocked the shawl, pinning it to my mattress for lack of anywhere else open enough to stretch it out — the length of one of the cast-off edges was the same as the width of my (queen-sized) mattress. It was dry just after lunch, and since it was a nice day, I took it out to the nearby lakefront park for some photographs (ta da!):

Just as well, because Toronto is in the midst of the summer's first heat wave. I had to be careful not to handle the shawl too much while I was taking pictures.

It was difficult to find a place where I could spread it out safely (don't say the grass, because we *cough* have a lot of dogs in this neighbourhood). The final blocked measurement of the "spine" was 121cm. That comes down almost to my knees, which is fine by me. I'm tall(ish), so I like it when I can make something long and generous to wrap up in.

I'm very pleased with this crocheted loop edging. It went reasonably quickly — it took two episodes of The Killing on Netflix to finish — considering how many stitches needed to be cast off. How many I don't know, because at some point there were so many that I decided not to waste my time counting. If the two halves on either side of the spine were symmetrical, I was happy!

I wound up having quite a lot of yarn left over. Originally I'd planned on just knitting until all of the green was used up, but it became very obvious that the piece was big enough and it was time to stop. I have about 300m of the second-lightest grey. That should be enough for a lacy scarf. I'll have to figure out what to do with the rest. I'm hoping to do something in the way of lightweight gloves, but all the lace-yarn glove patterns I have call for a lot of yardage to complete. There must be a way.

almost a souvenir by Katherine Hajer

Since last post, I've pledged to include the souvenir shawl in the #craftblogclub's latest challenge, which is to finish a lingering work in progress by the end of June. I only started the shawl in mid-May, but I know that if I don't push myself on it, it's going to wind up in the UFO pile. It's nice to have a slight amount of external pressure to get through these last few sections.

This is the shawl as of a few hours ago:

I have one narrow band of ostrich feather lace to do, then I'm going to knit the trellis lace in the green until I run out of yarn. And then it's wash and block time. I'm looking forward to finding out how much I can stretch this thing out.

The original pattern calls for a fringe, but I'm not much for fringes — the ones on the couple of pashminas I have are always getting unknotted, or stepped on, or fraying off. I do want to try the crochet scallop cast-off given in the book to aid in fringe-attaching, though, because I suspect it will make a nice, lacy edge all on its own.

I have at least two, and up to four, part-balls of yarn which will be left over from this. I have a crazy idea to make a scarf, beret, and possibly some gloves from them. Or if I find some woolly nylon that will match, socks. I really want to get the most possible use out of this yarn!

souvenir with some assembly required by Katherine Hajer

I'd decided to get the yarn to make a shawl while I was in Iceland, and in an astonishing show of sticking to plan and reducing stress by doing planned things before spontaneous things, I had the yarn bought within six hours of arriving:


The yarn came from a shop called Amma Mús, and it was just a ten-minute walk from my hotel. If you're in the area and need knitting yarn, needlepoint, or embroidery, they're well worth the visit. (And yes I know Isager is a Danish brand.)

The shawl is the Margrét pattern from Icelandic Handknits by Héléne Magnússon. The original shown in the pattern book is black with different shades of grey for contrast colours, but while we were on the bus between Keflavík and the hotel, my friend Kim kept saying I should include the moss green we saw on the lava fields. I think she was right:

The shawl is coming out smaller than prescribed. Since I like the resulting fabric, I'm sticking with the gauge I have and just adding extra repeats of the trellis and ostrich-feather bands. I'm using up yarn at a far slower rate than the pattern expects (for example, it calls for 500m of the second-lightest grey, and even with the extra repeats I'll probably use less than 250m), so no worries there. The extra repeats of the green trellis pattern mean the ostrich feather bands won't line up, but the eyelet "interference pattern" in the centre of the larger band means they don't line up anyhow, so I decided to stop fretting about it.

I'm just hoping to get this knitted and blocked before the heat and humidity of the Toronto summer hits in earnest.

yarny retaliation by Katherine Hajer

As you may recall from the last exciting episode of this blog, right before I went on vacation, my co-workers yarn-bombed my cubicle for my birthday.

Now: I absolutely cannot have more yarn in my apartment. It's already a major problem. I'm already enacting desperate measures to lessen the stash I have.

So I figured this was a good opportunity to use up yarn just come through the front door and stash-reduce a bit at the same time. I started before I went on my vacation to Iceland, got right back to it as soon as I returned, and worked throughout the week. And when I was done (about ten minutes ago), this was the result:

What you see in the above photo are six leaf-shaped facecloths, six leaf coffee cup cuffs, and six broken-rib, buttoned coffee cup cuffs. The creamsicle variegated, cream with pastel flecks, and lavender yarn are all from the yarn bombing. The rest is stash-busting, and it would be nice to say it made a dent, but mostly it just kept things at the status quo.

The broken-rib cuffs are my own pattern, as much as such things can even be a pattern. I wanted something that was interesting-looking, quick, and not too stretchy, but a little bit. The "pattern" goes like this:

  • Using worsted-weight yarn and 4.5mm or so needles, CO 15 sts.
  • Row 1: K across.
  • Row 2: K1, *yf, sl 1 pwise, yb, k1, rep from * to end. Note: yf and yb do not go over the needle, just between the points.
  • Repeat Rows 1 & 2 for about 20cm (38 repeats for my gauge). Check against a sample coffee cup — this part should reach around the circumference with very little overlap. Note that the stitch pattern tends to be tighter at one row-end than the other — this is okay, since coffee cups are cone-shaped anyhow, and gives your cuff a shaped top and bottom.
  • Buttonhole Row: K3, *sl 1 st pwise to right-hand needle, sl next st pwise to right-hand needle, lift first st over second st, rep from * 2 or 3 times, depending on your gauge and the width of your buttons. CO 2 or 3 sts (the same number you cast off) using the thumb or cable method. K3 or 5 (again, depending on how many you cast off for the buttonhole), then work another buttonhole. K3.
  • Next row: work row 2 per normal, treating the CO sts just like normal sts (some will just be slipped. That's okay.).
  • Repeat Rows 1 & 2 twice — 5 rows above buttonhole row. Cast off. I used a backstitch cast-off so the ends would match nicely.
  • Finish ends and sew on two buttons.

Tomorrow all of these will get randomly placed on people's desks, and I'll send out an e-mail to the team explaining where they came from and how it's using up the yarn bombing. I still have about 300g of variegated acrylic to use up, but that hasn't told me what to do with it yet.

For those who will want to know: each piece takes about forty-five minutes to make. The broken-rib cuffs are slightly faster to knit, but have the extra time for adding the buttons on. The leaf cuffs are probably the fussiest, because each of the four leaves is self-finished, which means there are eight ends to darn in at the end, plus one seam to sew the first leaf to the last. Each 50g skein of Bernat cotton yielded one facecloth and two cuffs, with only three or four metres left over.

This little mini-project shows how much I'm into the aspen/birch leaf motif lately. I get the feeling there will be more examples to come.

Important note: I love comments! But right now my web host has a bug with comment logins. Please feel free to leave a comment using the Guest option. You'll be able to ID yourself, mention your web site if you like, and say what you want to say!

this aggression will not stand! by Katherine Hajer

Tomorrow is my birthday, but I took it as a vacation day.

It's departmental tradition that people get their cubicle decorated on their birthday. Yesterday my co-workers gave me a cool see-through balloon (above), and a purple orchid I'm keeping at work so it gets some sun, and we had cake:

And I thought that was a very nice way to celebrate a co-worker's birthday, and was grateful they remembered.

Then today, the two people who are covering my work while I'm on vacation next week insisted we have a meeting to finish the knowledge transfer right before lunch. 

It's okay, I said. You know I'm going to send you a detailed e-mail with all the info. Don't I always? And we can meet in the afternoon. It's all cool. I just want to get something done so the person I'm sending it to isn't waiting on me.

Nyuh uh, they said. This time works best for us.

So I went to a meeting room and showed them what state all my documentation for all of my CRs was in, and when I came back to my desk it looked like this:

I got yarn bombed. With acrylic.

And sure it's all lovely and fun and colourful and birthday-ish, but it's a bombing.

And you know what that means.

Yarny retaliation is on the way.

Important note: I love comments! But right now my web host has a bug with comment logins. Please feel free to leave a comment using the Guest option. You'll be able to ID yourself ,mention your web site if you like, and say what you want to say!

contrast by Katherine Hajer

Somehow I've made it through the last couple of years without a scarf. My old winter coat was too high-necked to warrant one, and since I got my new coat I just haven't figured out what kind of scarf I wanted.

I finally just grabbed a free pattern off Knitty, got a skein each of red and black yarn at The Purple Purl, and had at it. Once I figured the brioche stitch lace pattern out (that took three false starts), it went very quickly.


It's reversible, and the keyhole closure means it will stay on. The only two mods I made were to have longer tails than the pattern called for (the better to fill the neck of my coat), and to inc 1 st for the red part of the keyholes for symmetry.

The scarf would be good as a second or third brioche stitch project. It might be a bit tricky as a first project. The instructions were very clear, and really there's only one pattern row or of a four-row repeat that's a bit complicated, but it's easier if you already know how brioche stitch works.

squishy pastels by Katherine Hajer

Ever made something from scratch that you usually buy prepared, and then feel like an idiot that you didn't just make it before? That's how I felt when I made my nieces play dough for Easter:


The two batches took me half an hour, total, and all of the ingredients are regular pantry items (okay, I don't normally use white flour, but you know what I mean). The dough will last for about six months, and although I doubt it tastes very good, it is non-toxic.

I feel like making some for myself with essential oils. I could work stress out and moisturise my hands at the same time!

back in the saddle by Katherine Hajer

Last month I got a bit of a body blow on the crafting front. I lost my knitting bag on the subway, and it was never turned in to the lost & found.

The bag included my tools pouch, which amongst other things contained the One Perfect Tapestry Needle I'd had since I was nine years old. It came with the first needlepoint kit I ever made all by myself, and I'd been using it to sew together and darn most anything yarn-like ever since. It's hard to explain, but it was just the right size, shape, and finish to do everything from bulky sweaters to fingering-weight socks with. I would use other needles, but it was my default, and I'd used it for over half my life.

The knitting was a second pair of Space Invaders Socks I was working on for my friend Cathy, a request from her. I'd just made it past the leg and was working on the foot of the first sock, and I was already late with them.

The bag itself was a loss. It was a hand-made, hand-screen-printed promo item for Alice Hearts Welsh Zombies, a hilarious novel I picked up a couple of years ago when it was first published. The authors themselves made the bags as giveaways for when people bought two or more copies of the book.

Of course, the grown-up thing to do is chant, "They were only things, if it happened it was meant to be, you've had lots of close shaves before and it was finally your turn," but still... it's hard to get going again. Of course the day I lost the bag I was feeling physically crappy, and had had a busy day at work, and of course there was a subway weirdo near me who was being weirder than the norm and not a little scary... it was one of those perfect storm things.

To make up for losing the Space Invaders Socks, I made Cathy this Skull Cap:

It's a free pattern that Icy Sedgwick posted to Pinterest. I added the optional lining (hard to see here) in a greyish-purple colour. Despite adding some extra rows of the black lattice pattern, the hat came out shorter than I would have liked, but Cathy says she's been wearing it, so that's what's important.

The entire hat was sourced from stash yarn and crocheted in an evening. It was exactly the kind of quick, funky project I needed to get my crafting mojo back in gear again.

I also made (and managed to not lose) Cathy these orange spider socks:


These were another free pattern from Ravelry. The instructions on these were excellent — they were a lot easier to make than they look. The only real mod I made was when I was working the little spiders, but that was just to suit my brain, not because I disagreed with the pattern per se. The finished spiders look about the same as the ones in the pattern. These have been done since before December, but I didn't want to post about them until Cathy received them.

That leaves one more thing for Cathy on the needles and one new thing on the needles for me. I'm slowly getting used to my new tools pouch. But I'm still on the lookout for a new One Perfect Tapestry Needle.


surprise heart necklaces by Katherine Hajer

As recently as 3 February, I had no intention of making anything for Valentine's Day. It's not a holiday I'm that crazy about. If you're in a relationship, then you should be enjoying it more than once a year; if you're not, it's just a reminder that lots of people around you are. Blech.

But then: Kirsty over at Miss Emily's Room asked for other pairs of eyes to check a crocheted heart plushy pattern she was trying to follow, and the easiest way to do so was to make one myself. In half an hour's time (which included taking in-progress photos) I had this:

All right, so what to do with it?

Tomorrow I'll be seeing the nieces for a family get-together, and they're finally at the age where they can be trusted to wear play jewelry without strangling themselves. So I cranked out some pink and red knitted cord, twisted it together, and attached it to the crocheted heart. The results look like this:

Everything is nice and secure, so it can take a lot of play-time at the hands of pre-schoolers, but the cord is nice and stretchy to fit over heads with pony-tails.

And besides, now it's squishy and pink. That has to count for something. I'm sure they'll let me know. I made a second one so they could each have their own.

Meanwhile, I repinned a heart-shaped knot tutorial from Kate Williams's boards. I had some more spare red wool handy, so I made two more lengths of knitted cord, tried out the knot (got it on the second try!), and made knotted heart necklaces:


To me they look more like strawberries, but hey, with my nieces that works just as well. I grafted the ends together to make them stretchy yet clasp-free.

So now the nieces each have two heart necklaces to wear on Valentine's Day or whenever they please, and I got to try some new things!


scale by Katherine Hajer

On New Year's Day I started crocheting cotton boxes for my washroom. They're part of an ongoing get-tidy project I have on the go, they are being made 100% from stash, and I'm tired of having to dust things like my makeup bag and the spare bottles of shampoo.

As I was working on the first box, I learned that I'd won a prize in a charity raffle I'd entered a few weeks before. The prize was an assortment of cosmetics, and it came in a very nice black basket woven with strap material. I decided to crochet a lid for it while I was at it. This was the result:


The lid is natural-colour, worsted-weight dishcloth cotton single crocheted with a 4.5mm hook. The beaded edging is size 11 seed beads crocheted with perle cotton on a 0.6mm hook. The basket is 19cm per side, for a total of 76cm. There are sixteen motifs per side, so sixty-four in total, plus an extra orange picot to complete the repeat. There are seven red beads and four orange beads per motif, so that's a total of 708 beads (448 red, 260 orange) just in this edging.

One of the red circular motifs is about the same size as one of the lid single crochet stitches. It's been a little weird switching back and forth between the two.

The first box is done, but I'm still working on its lid. It will have a beaded edging as well, but in a different pattern:

This has been nice, easy work (even the beaded edge, really, although its tiny black stitches get finicky). Really, though, I need to get back to the socks for Cheshin.

The box idea came from Erika Knight's Simple Crochet, and the beaded edging from Midori Nishida's The Beaded Edge.


reversible, reusable gift wrap by Katherine Hajer

The weird thing is, I remember enjoying wrapping gifts. I remember taking pride in getting the corner folds mitred just so. I remember feeling pleased when the edges of the wrap met precisely in the middle of the short sides, and came to a nice sharp point.

Somewhere along the line that stopped. It may have been paper that wouldn't behave, or running out of sellotape, or something, but I switched to commercially-available gift bags.

Does anyone else besides me remember when gift bags were touted as being reusable and therefore more eco-friendly, even though they were fully printed and cost a lot more than paper wrap? It rarely seems to work out that way.

At least a year ago, my mum gave me an article from Canadian Living about furoshiki — Japanese fabric gift wrap. The instructions were so simple, even I didn't need a lot of diagrams: you just find two squares of cloth (a square metre is a nice size) that complement each other, sew them together with a gap in one edge, clip the corners, turn the whole thing right side out, then topstitch the edge (and sew the turnout gap shut). You're left with a reversible, square piece of cloth. Tie up a gift or three inside the cloth and ta-da! reusable, washable wrapping paper.

Canadian Living  posted a video showing a couple of ways to wrap objects in furoshiki with grace and flair. Sadly, I did not discover the video until after I took the photos below. Oh well, next time. There are a lot of resources on-line to learn more about furoshiki.

I deliberately went with non-Yule patterns so I could use them throughout the year. Your mileage may vary.

The nieces got pink and purple furoshiki. This year, for my own sanity, I colour coded the gifts so that Niece the Elder had pink on the outside, and Niece the Younger had purple on the outside. Therefore, I can say with confidence this is a photo of Niece the Elder's pink toy racing car when it was wrapped up.

This is a small cloth, made from a couple of fat quarters which were trimmed down to squares. I used quilting-weight cotton for all of the furoshiki I made this year.

The next photo shows what I did with the trimmed off fabric of the fat quarters, and with some plain white cotton I had from the book cover I made:

I just used a Sharpie to write on the tags, rather then embroider them. I was low on time, and I'm not sure I could have got embroidery to fit as well.

The above photo shows a furoshiki that is about a metre square. It had Sew Red, the hardcover edition of Stephen King's Doctor Sleep, and the Dear Jane quilt book in it, along with a box of 16 Ferrero Rochers on top.

I bought the fabric before I got all of the gifts, so I wound up getting more fabric than was immediately needed. I still have two medium-ish and one large cloth left to sew up, all in the blue and green fabrics of the cloth in the last photo. It feels good to sew these, because you can actually imagine getting some use out of them. They are completely not intimidating to sew: no precise sizes to worry about, no tricky seams.

Plus, they don't rip if you tug at them to adjust a corner.

knit that shit (and crochet too!) by Katherine Hajer

Here they are, the projects I aim to get done before 1 January 2013. Right now they're in no particular order, but as they get worked on and (gulp) completed, I'll try to arrange them accordingly.

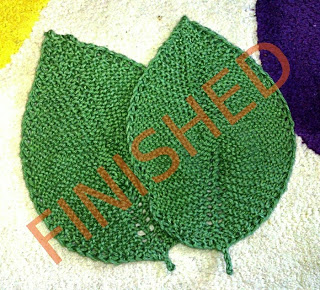
FINISHED surprise facecloth

Just when I thought I'd found everything, this facecloth showed up while I was gathering up the cotton for the doris daymat mk ii (see below).

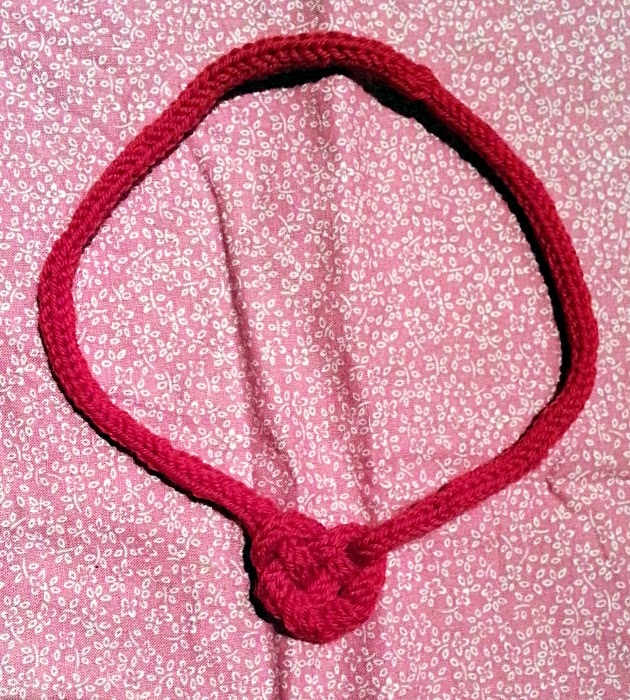
Originally I was making the pattern shown in the photo above, but it just so happens that the morning I discovered it, I read about a free leaf facecloth pattern. So I wound up making two leaf facecloths instead:

Started: ummm, I vaguely remember starting this last winter. Not sure why, because I don't need any new ones. The new leaf pattern was started 18 August.
FINISHED: 18 August 2012

What stopped it: maybe that I realised I don't need any new ones?

What needs to be done: Sweet nothing. I rippped out the start of the old pinwheel pattern, and whipped these two up from that one ball of yarn, with a bit left over to use as part of a multi-coloured pinwheel sometime. Each leaf took almost exactly 45 minutes to make. I did one at the hairdresser's, then another when I got home.

Challenge: Accepting that I found a sixteenth item on the needles. But it's done now. This one was like ripping off a band-aid, with prettier results.

fractal jacket

This is a late addition that I only remembered this morning just before I went to work (4 July).

Started: about 4 years ago, during the Toronto International Film Festival (something to knit while standing in queues)

What stopped it: the TIFF finished

What needs to be done: the rest of the back/sleeves, the front/sleeves, finishing.

Challenge: finding all of the yarn that goes with this; learning to accept that I'll never match the striping on the fronts to the back because the whole point is I'm using random stripes, and it will be nigh-impossible to tell if it was the blue-purple yarn or the purply-blue yarn for a given stripe. They're very blendy.

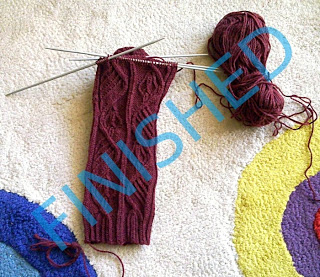
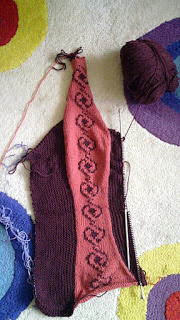
FINISHED hearts and harps socks (Kristi from Sock Innovation)


Started: August 2010
FINISHED: August 2012

What stopped it: Excruciating upper back pain (now thankfully under control).

What needs to be done: the rest of the sock in the photo, and the other sock.


Challenge: I may not have enough yarn. I also know I did make some mods to this sock to make the size larger, but I didn't write them down. I have to figure them out for the second sock.

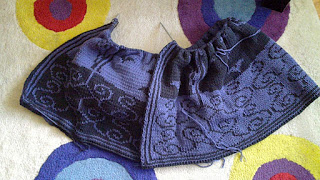
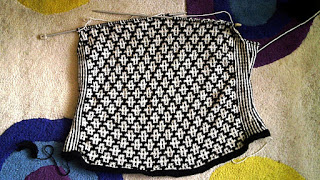
double knitted jacket (Central Park from Double Knitting)


Started: Over five years ago.

What stopped it: The realisation that I wouldn't get it done in time to wear it for that spring.

What needs to be done: The rest of the body and the sleeves; finishing.

Challenge: I was shortening the body by omitting rows whenever it was appropriate. Needless to say, I did not make any notes on what "appropriate" meant. The same will need to be done on the sleeves.
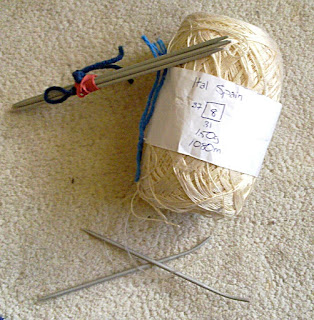
1942 doily


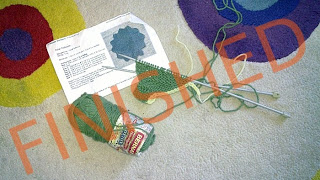
Started: It hasn't been started yet (see photo).

What stopped it: a variation on second sock syndrome  — I'd made one in less than a week, and for some reason it was hard to get into making another one.

What needs to be done: the whole thing.

Challenge: figuring out where I downloaded the pattern to.

beaded jacket


Started: sometime since I moved to the Beach. That is, in the last ten years.

What stopped it: the stitch pattern needs more chart attention than it looks, plus, being made of 100% wool, it was impossible to knit in transit during the summer.

What needs to be done: the fronts (one front started), one sleeve, finishing.

Challenge: I have more than one dye lot of this yarn, and have no idea which belongs to the jacket. Or, for that matter, if I have accidentally dug into the yarn for this jacket thinking it was stash.

estonian stole

Started: About four years ago.

What stopped it: Haven't the foggiest.

What needs to be done: Every time I pull this out and look at it, I'm surprised there's more done than I thought. There's maybe 2/3 of the stole plus the borders to do. Finishing is minor on this sort of thing (about the same for plain socks), but it will need to be done too.

Challenge: Figuring out which pattern I was using, and checking if I made any mods to it that I didn't write down (likely, but not proven).

mosaic jacket


Started: Last summer. Or maybe it was the summer before that.

What stopped it: Winter.

What needs to be done: The other half of the back, the sleeves, the fronts, the borders, finishing.

Challenge: There was something funky about the gauge and/or the body length, which is why I was working the back first instead of the fronts, like the pattern said (non-standard but that's how they wrote it). I'll have to figure this out again.
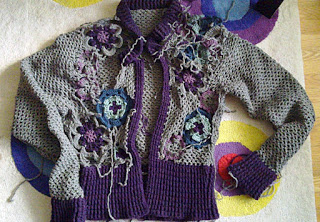
crocheted jacket

Started: um... five years ago?

What stopped it: a lack of confidence that I was finishing the fronts correctly. Also the constant worry that I will do all this work and it will look like crap on me anyhow.

What needs to be done:
finishing the fronts, darning in the last of the ends (some are already done).
 

Challenge: will probably need at least one reality check with expert crocheter J-A.
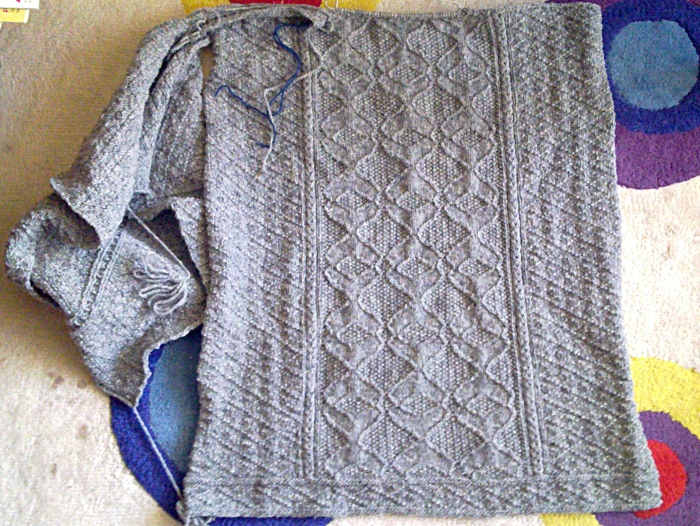
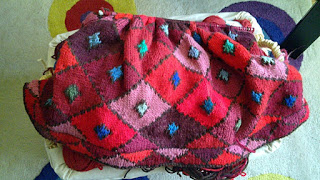
red diamonds jacket


Started: within the last three years.

What stopped it: I have no idea, but I seem to always get stuck on Kaffe Fassett patterns just when I'm getting the hang of them. Self-defeating masochism.

What needs to be done: the other half of the back, the sleeves, the fronts, the borders. Finishing. Hm, the same spot as the Mosaic Jacket. And as I recall, the Beaded Jacket had a similar sticking point earlier in its life.

Challenge: Will the colours be suitably blendy when I'm done? Will I have the guts to wear it?
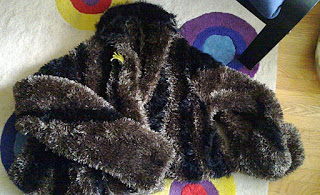
faux raccoon jacket


Started: about five years ago.

What stopped it: I started it because I hate raccoons sooo much — they cost me over $3,000 in extra heating bills one year because they destroyed the attic of the apartment I was living in. The jacket is not from real raccoon (100% synthetic, in fact), but it wasn't making me hate the real vermin any less.

What needs to be done: Darning in ends, sewing on closures. It should probably be lined as well, but strictly according to the instructions, that's it.

Challenge: I think the sleeves are too long, and due to the construction method and fibre content there's not a whole lot to do about it.
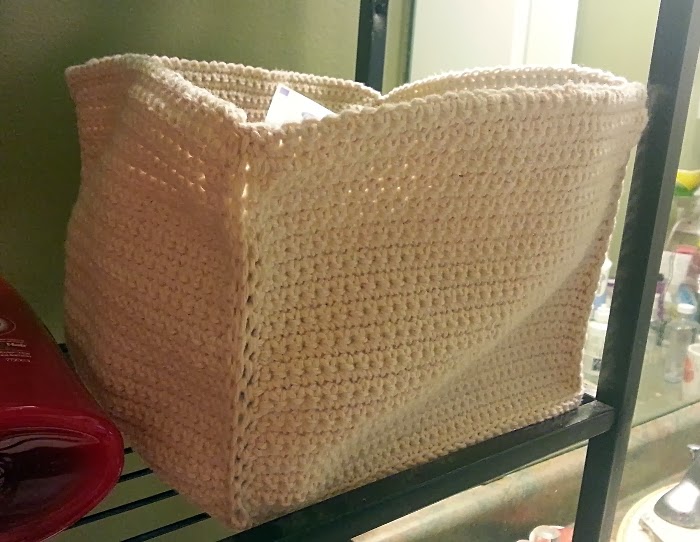
handbag


Started: about five years ago

What stopped it: moving to the apartment I live in now (and losing the lining pattern paper pieces I'd traced out).

What needs to be done: Lining and finishing; maybe add a clasp.

Challenge: re-doing the lining pattern.
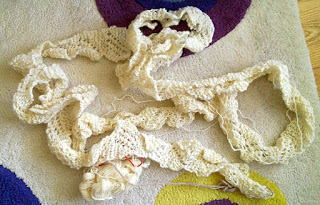
shetland shawl


Started: over twelve years ago.

What stopped it: Moving cities; stress-induced starting of many other projects.

What needs to be done: the rest of the border and the entire centre part of the shawl; finishing.

Challenge: I hope the needle size I remember is the needle size I was actually using. I also hope the yarn I bought to finish the centre actually matches the handspun I used for the border. Oh, and I hope the thick-and-thin handspun does not break stitches when it comes time to block the thing. That's all.

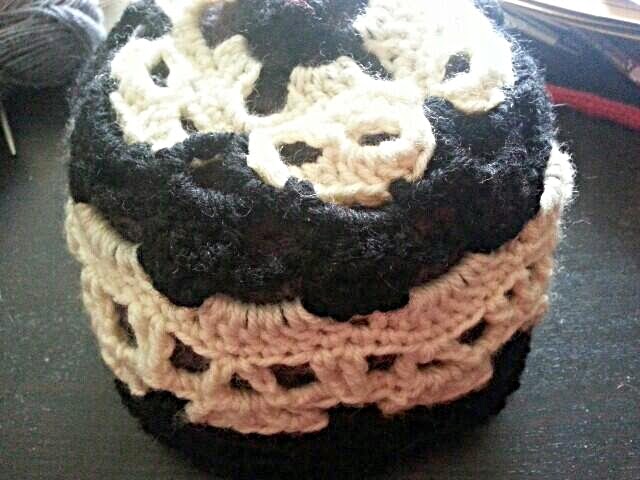
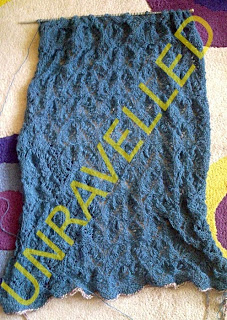
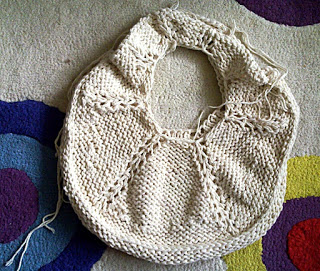
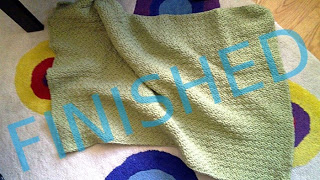
FINISHED doris daymat mk ii


Started: last summer.
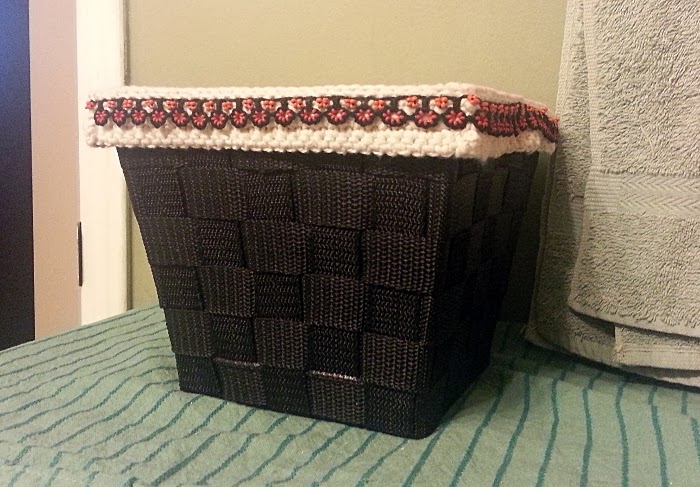
What stopped it: I did finish the mat part, as you can see from the photo above. But I still want to add the flowers like I did to the Mark I mat.

What needs to be done: The flowers and attached them to the mat.

Challenge: Finding where I put the flower yarn. Okay, I think I know where it is, but I'm scared what state I'm going to find it in.

This is now finished. Quite frankly I got tired of accidentally knocking the bag of flower yarn over and causing more tangles. Inspiration comes from all sorts of places.

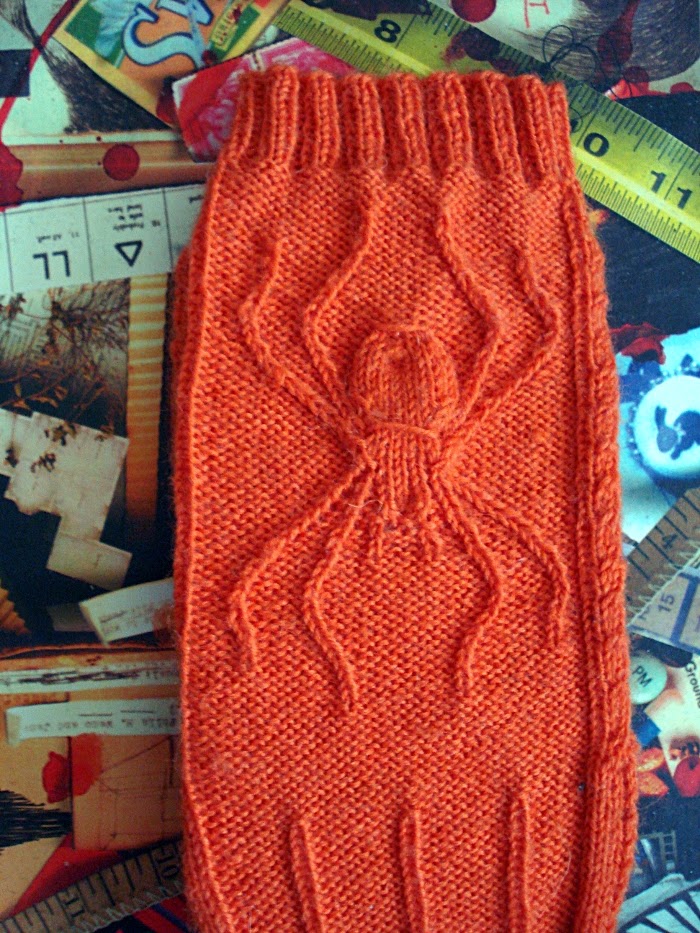
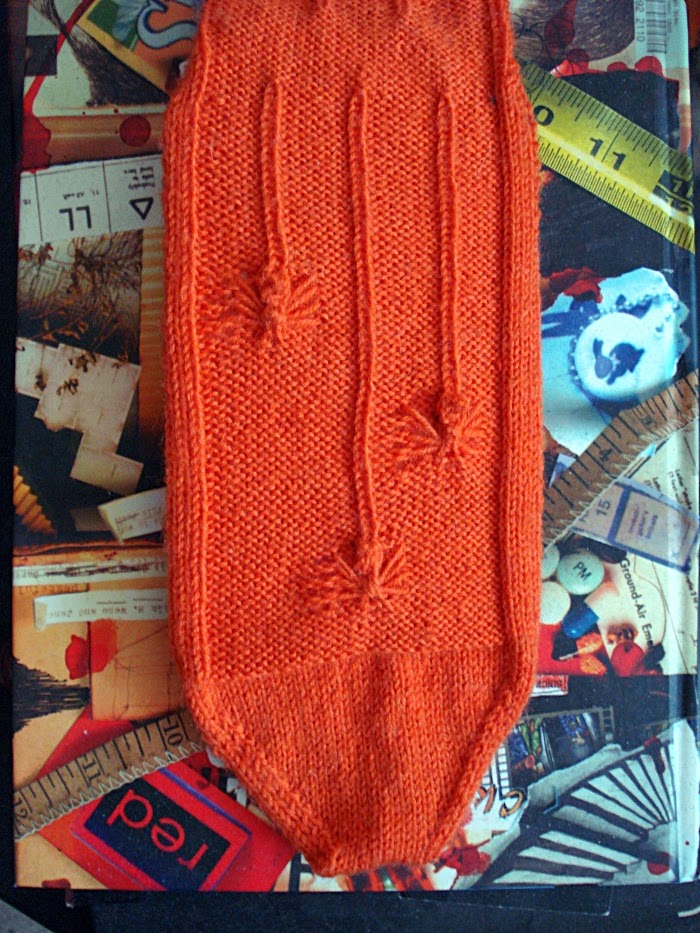
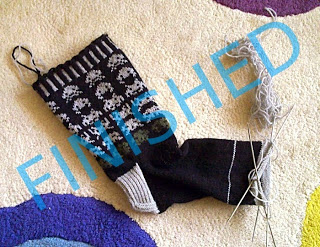
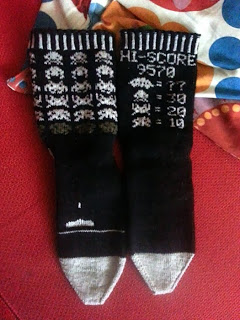
space invaders socks


Started: a year ago last spring. Now finished!

What stopped it: Excruciating upper back pain (now thankfully under control).

What needs to be done: the rest of the sock in the photo, and the other sock.


Challenge: Finding the yarn needed to finish the other sock.

modular jacket

Started: last winter

What stopped it: it got replaced with the zombie pillows, which were for a birthday gift.

What needs to be done: The rest of this piece, plus the other front, the sleeves, the back, the borders, and the finishing.

Challenge: Figuring out where I was at with the decreasing for the module currently on the needles. This time, I do have some notes, though.

KTS: beep! by Katherine Hajer

I actually finished these about a month ago, but I've been busy writing up a storm for NaNoWriMo. So no blog post until now.


This is the third and last pair of socks slated as part of Knit that Shit. Like the other pairs of socks in the list, they were started just as my spine was going badly out of alignment, which is why they took so long to finish. I had to wait until I could knit without being in pain.

My chiropractor noted that I seem to be getting better at keeping my spine and other joints in place, so getting these done is a nice reward for that.

The original pattern is free online from Knitty. There were a few mods on these. I chose to use an olive instead of lime green for the bottom row of invaders, mostly because it was already in the stash. I also did my standard square heel instead of the striped short-row heel given in the pattern. Finally, I used my usual double-pointed needles instead of using circulars as given in the pattern. I know it's heresy, but I just don't find the circulars easier to work with for socks. Nothing against those who do, but I just don't.

Besides the thrill of actually getting these done, I was very pleased with the duplicate stitch "shooter" on the foot of the game sock (the sock on the left in the photo). My duplicate stitch has not always been consistent in the past, and this time I found a way to make it more consistent, which made me happy. (Turn the work upside down every other row so you always work right to left, or else switch hands so you are always working away from you.)

I've finished some other things in the meantime, but they're all Yule gifts, so they won't get posted about until later next month.

#craftblogclub: hallowe'en necklace components by Katherine Hajer

This month's #craftblogclub challenge was to create something for Hallowe'en, but working in a craft that is new to you.

I chose to use a wire jig. I've used a jig a grand total of one time previously, and that was just to make sure I understood how the thing worked. This was the first time I wasn't just making a practice shape.

When I was a kid my parents used to give me puzzle books and colouring books to work on during visits to the grandparents so I wouldn't get bored (because, er, yes, it was an issue). My grandmother saw some of the geometry puzzles in one of the books and taught me a puzzle her mum had taught her. You make a partly-filled grid of twenty-one dots on a piece of paper, and the challenge is to encircle each dot, without lifting the pencil from the paper, in the most efficient way possible. She showed me the solution, and added a bit shyly, "Plus it makes a pretty pattern."

That was when I was eight years old. It's now the only shape I doodle — my notebooks for work are covered in different versions. I've done some research, and found out the same shape shows up all over the place (India, various points in Europe), and has all sorts of different meanings attached to it. To go through all of them would make a too-long blog post, but here's what it looks like when I pegged it out on the wire jig:

Off the jig, it looked like this:


I finished the ends to make a necklace bail, and made some smaller components with extra loops to use within the strap part of the necklace:

The next steps will be to make beaded sections to go between the components and add a clasp. Right now I'm running low on time, so I don't know if I'll get it done in time for Hallowe'en, but at least it's on its way.

In case you're wondering what this has to do with Hallowe'en... I went with the broader "day of remembrance/day of the dead" understanding of the day.

I wish I could wrap the wire on the jig well enough to make evenly-sized, perfectly spaced loops, but for now I'm willing to leave that at, "oh well, this is something new." I do find it amusing that the wire version of the shape is wobbly in the same way as my hand-drawn doodles.