sewing

no-paper patterning by Katherine Hajer

I got a copy of Birgitta Helmersson’s book Zero Waste Patterns: 20 Projects to Sew Your Own Wardrobe a few months ago, and have been poring over it ever since. Thanks to the excellent Check Your Thread podcast, I have been shifting to thinking of everything fabric as “resources”, which led me to the idea of sewing a wearable mock-up dress from the instructions in the book.

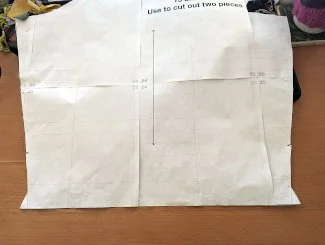
And I did have several old sheet sets sitting in a storage box… it made sense to educate myself about zero-waste patterns by using some old bedlinens. Since the bedlinen doesn’t match standard fabric widths, it wouldn’t be zero-waste as such, but Helmersson’s methods would help ensure I had nice rectangular off-cuts that would be easy to integrate into another project.

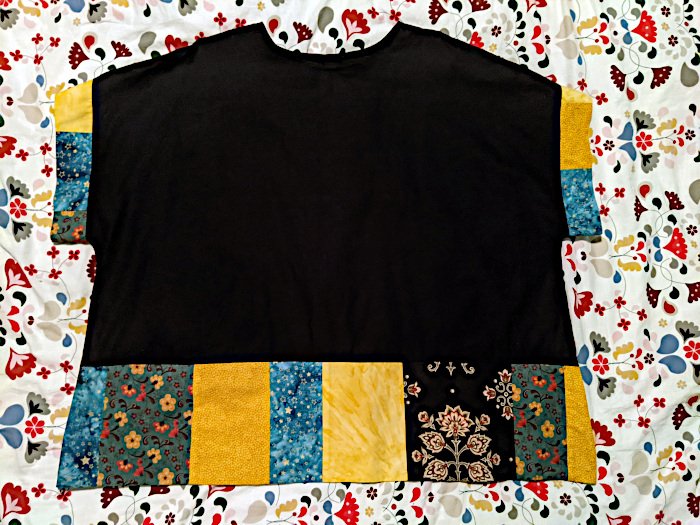
The dress in the above photo is made from one fitted sheet and one pillowcase (because I miscalculated the usable width and length of the sheet), plus some buttons I already had. The only purchase was for matching thread.

Things I liked:

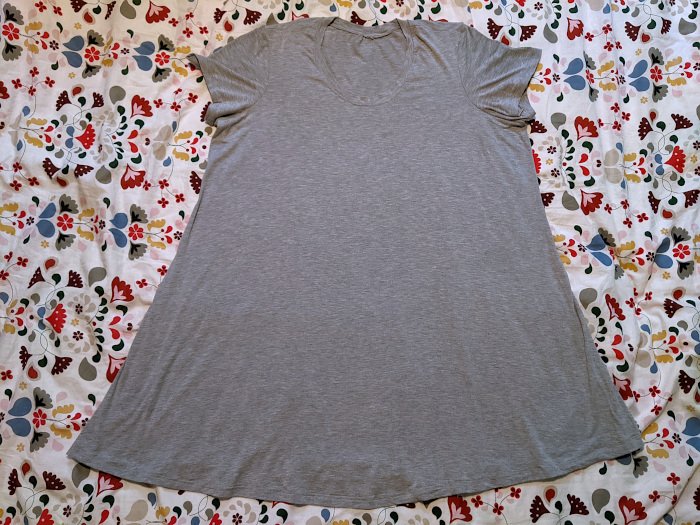
  • I had an incredible amount of control over the dress details. The bodice is very oversized (on purpose!), and its width is based on a tunic pattern I like. The bodice length, shoulder shaping, and other details are from Helmersson’s boilersuit pattern in her book.

  • The sleeves are based on a different pattern from the book. I very much liked how the sleeve cuffs are four fabric layers deep (plus a fifth layer of sleeve fabric), so they have structure without requiring interfacing. The same thing was done for the button placket/neck edging. I took an educated guess on the sleeve length, accepting I may wind up with 3/4 sleeves, but instead they fall perfectly to my wrists.

  • The skirt size was pulled from yet another book pattern, and worked out well for me both in width (a little bit gathered, but not a lot since the silhouette is already oversized) and length. I also managed to make some seam pockets for the skirt, and arranged things so they are placed ergonomically.

Things I didn’t like:

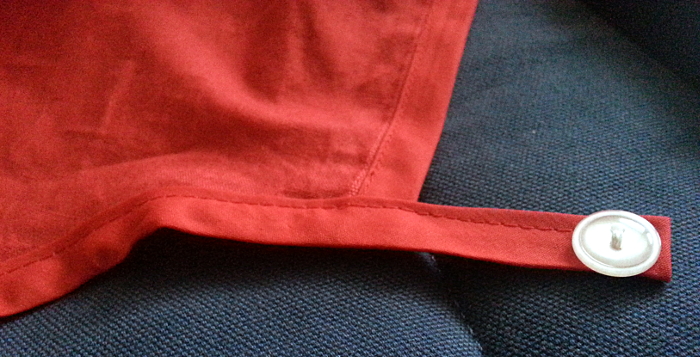
  • The placket took three tries. In the end I gave up on sewing it on in one go, and did the wrong side first, then topstitched the right side over it. So on the inside, you can see two stitch lines, but on the outside only one. Know your sewing limits.

  • I sewed the very bottom of the placket shut per the boiler suit instructions, but didn’t take the seam allowance into account, so it doesn’t overlap perfectly above the waist seam. Oh well.

  • The top button should have been a bit lower, so the buttonhole ends just before the V shaping starts.

  • Next time I need to gather a skirt, I’m making separate basting lines for the front & back, instead of one big baste around the entire waistline.

Notice that all the things I liked came from the book and the designs, and all the things I didn’t come from my own sewing skills!

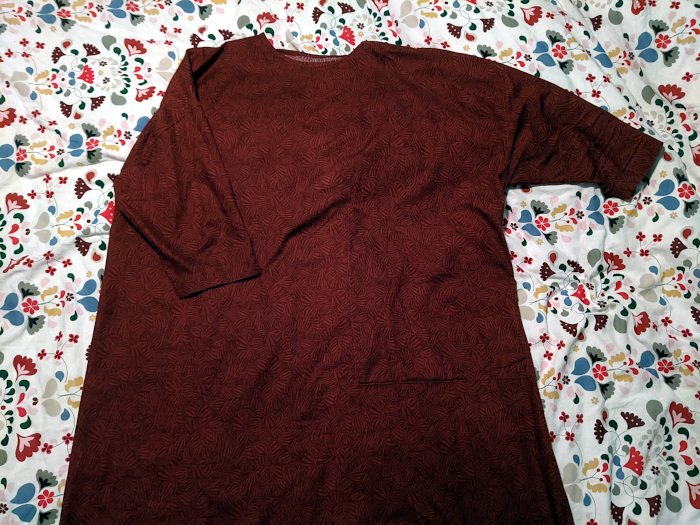
The end result does look a lot like the ZW Gathered Dress pattern Helmersson sells separately from the book on her website (which I admit was the general idea), but it’s not the same; the back neck facing and some other shaping are different. As for the zero waste part, I pretty much used up everything I cut. The few leftovers will make good patch pockets, or bag linings, or trim.

I’m looking forward to doing more from the book. I might even, you know, follow one pattern by itself next time. The pattern collection is more than enough to create a capsule, or just regular, wardrobe, without making it look like you’re using the same patterns over and over.

Verdict: am I pleased with the dress? Very! Am I okay with wearing bedsheets out and about? Not sure yet, but I have worn the dress at home a few times and it’s super-comfy, practical, and surprisingly warm (I guess sheets have a denser weave than fashion fabrics?). It’ll be great for colder weather, either by itself or under another layer. I would definitely like to try out more versions of the dress in different fabrics too.

pattern and puzzling out by Katherine Hajer

I’ve been doing a lot of sewing in the last several months, and I’m starting to see a difference in the general construction mindset between sewing and knitting or crochet.

Knitting and crochet are more like playing with Lego. You build up stitches until you get the desired shape and size, and then you do your finishing. Even with seamed garments, there’s play between seaming and building, seaming and finishing. Often there will be a bit of both happening, like when you pick up stitches along a sweater neckline to knit on a collar.

Sewing is more like putting a puzzle together, except you have to cut out the puzzle pieces first.

Maybe there will be adjustments required to make the finished item fit better.

Or maybe there will be pattern mistakes. Crochet patterns are often off on their stitch counts, as are knitting patterns. Somewhere in my Vogue Knitting magazine collection is a pattern for a sweater which is missing the sleeve instructions entirely — and they are non-standardly shaped with a different stitch pattern from the body. Not a problem for someone who knows how to design and construct their own sleeves, but a total roadblock for those who don’t.

Most pattern errors seem to be made because of deadline pressures. Sometimes, especially for indie patterns with no deadlines attached, the author either couldn’t be bothered, or didn’t realize technical editing was even necessary. Other times it’s because the author was trying to give the reader more than they had the time and resources to give.

All of the above is a long preamble to the jacket I just finished making from Bold & Beautiful Easy-Sew Clothes. All the signs point to an author who had more care and passion than they had time to give under the deadline, which meant I had to improvise a few times. The book errors I’ve discovered so far have erred on the side of generosity, meaning they give the reader as much as possible, but there have been a few just outright errors.

For the book overall, the most notable error is in the sizing index table on page 7. There are more sizes available on the accompanying CD than the table indicates. For example, the gathered skirt pattern is listed as being available for US sizes 10-16, but on the CD a size 18-20 pattern is also included. Fortunately, there is a different table on the CD listing the actual sizes available.

This tells me the author’s heart was in the right place, but they just didn’t have the time to finish the book properly and have the technical editing done.

On the Kimono Jacket shown above (that’s the official name; it’s more like a reproportioned Spencer), there were also two errors which required some work to overcome: the button placket provided on the size 2 pattern I was using was actually for the size 1 version, and was therefore too short for the front it had to attach to. Upon checking the size 1 pattern file, I confirmed it has the size 2 placket, which at least would be easier to recover from.

Also, the sleeve shaping is off. The cuff as drawn is far deeper than what the instructions say to expect. I was able to fix this myself with a small amount of redrawing. The top photo shows the original cuff, the bottom the updated cuff after I did some sorting-out.

In the end, it was all right that the placket was a different length because the two fronts and the back are all different lengths anyhow, and the sleeves were an easy fix.

I'm not much of a sewist (yet?), so this project had some personal firsts:

  • first time using interfacing

  • first machine-sewn buttonhole

  • first facing

  • first sleeve seam topstitching

  • also first improvising on already-cut pattern pieces

The pocket is also not quite made the way it’s shown in the book, but that is on me for not figuring out the instructions until it was too late.

I’ve worn the jacket a few times and been pleased with how it fits and how it turned out in the cotton canvas I used. I’m looking forward to using it as a layering piece come spring. The green gives it sort of an army surplus vibe, and I’m planning on treating it as a neutral colour (even though it’s not really).

on the sew again by Katherine Hajer

My sewing machine has four (four!) dials which all control different aspects of how the thread interacts with the fabric. Two of them are not supposed to be adjusted very often; one of these is set at the factory and is not supposed to need adjusting often, if at all.

The last week of September, I wound up adjusting all four until I got a consistent stitch out of the machine.

Since then, I have made one item of clothing per week, plus some extras as I go along.

This gallery has most of them (er, as of late October). The only thing I left out was the black pair of dress pants because they’re just a black pair of dress pants, and therefore a photograph wouldn’t show very much.

Things I have learned so far:

  • there are way more free or pay-what-you-can patterns out there than you may think before you get into it

  • sewing is, or at least can be, way, way faster than knitting

  • you don’t need to be a dressmaking master if you (and this is important) take your time and keep a seam ripper handy


a palpable kit by Katherine Hajer

Usually this blog comprises notes on things I've made. What doesn't get reported is that often I receive things other people have made, because I know a lot of very talented and artsy DIY people. Most of them have their own blogs (those that want them), but this one I wanted to highlight because I was given something DIY... so I could DIY with it.

My friends Tara and Rob, in addition to being better at sewing and cooking than I'll ever be, are also very good at creating meta-level, big-picture projects where everyone does a little bit and gets a lot out of it. This year, they made some of their friends — the ones they knew would go in for this sort of thing — preserving jar carryalls, complete with preserving jars. The idea is that over the harvest season we will all make some sort of preserve to go into the jars, then gather for a swap meet when everyone is ready. Make one recipe, get six different types of preserves back. How cool is that?

Tara claims making these carryalls (and she had to make several) wasn't that big a deal. It would take me several evenings just to wrestle one through the sewing machine, so I am totally impressed. Not only do they have individual pockets for each jar, but they have side pockets as well. They might be good for slipping tasting notes/recipes/serving suggestions into.

Now I've got to figure out what to make with them. I've flipped through several ideas already, and will probably go through more before it's actually time to get preserving.

superhero accessories by Katherine Hajer

both superheros.JPG

I finished the nieces' superhero knits a while ago, but I didn't get around to making the things that go with them until it was almost time to give them as presents. Niece the Younger very specifically asked for a cape to go with her Superman sweater ("so I can fly"). Niece the Elder didn't say she wanted a tiara like Wonder Woman, but she did want the Wonder Woman sweater, and if Niece the Younger was getting a cape accessory, I needed to balance things make something to go with the Wonder Woman theme. At least a tiara is canonically correct.

The cape is sewn, not knitted (it's lighter and less likely to stretch out that way), and I am terrified of sewing, so I did the tiara first:

There are lots of free crown patterns on the web, both in knit and crochet. I took this one and reduced the number of points to one, then embroidered the red star on. The yarn is leftovers from the Wonder Woman sweater itself, with the gold yarn worked double so it's stiff enough to hold its shape when worn.

The tiara only took part of one evening to make, which left me with absolutely no excuse to not start on the cape. I decided to just take it step by step: iron and cut the fabric one day, pin the next, sew the next, finish the day after that.

Olga from work is much better at sewing than I am, and kindly sketched out the shape I needed to cut on a spare piece of paper. I followed her sketch and what she'd given as instructions, measuring against the length of the finished sweater and its neck width to get the inner and outer curve measurements. I surprised myself by cutting straight the first time (I had more fabric ready if I messed up). The next morning, I pinned bias tape along the edges like my chiropractor had explained.

The sewing went better than I thought. I even remembered what my mum had taught me about stitch length. I did wind up having to redo the neck part, but that was okay, because as I was ripping off the original length of bias tape for the neck, I remembered that I should stay stitch the raw edge around the neck curve before applying the bias tape.

And yes, I needed advice from three experienced sewists to finish this thing, and I still felt anxious about it.

The last step was to sew buttons onto the tabs extending from the neckline, and create corresponding button loops on the wrong side of the sweater so Niece the Younger could attach and detach the cape as she liked.

cape button loop.jpg

The sweaters seem to have been well received, in that I've seen both nieces wear them more than once. The day after Yule, Niece the Younger put the Superman sweater on over her pajamas when she woke up in the morning:

silly superman.JPG

Niece the Elder wore her Wonder Woman sweater to school the first day back after New Year's.

Usually I just let people put their own feedback in the comments, but this time I'm going to let Niece the Elder have the last word, and quote the comment she put on Facebook when she used my mum's iPad to look at the photo at the top of this post:

It. Is awesomely. GOOD!

So there.


the week of crafting dangerously: the sequel by Katherine Hajer

Last time I blogged about the oya I made: one for myself, and one for Bonnie, the office manager at the wellness clinic I go to.

Truth is, those weren’t the only items I had to make last weekend. The wedding shower for my youngest brother’s wedding was on the Sunday, and I wanted to make furoshiki for the shower gift, and cushion covers for the cushions I was giving them. The cushions weren’t on the registry, but my new sister-in-law mentioned she liked some cushions my mum had made, and it just so happened I knew that the fabric came from IKEA. Turns out, once I got there, I discovered the cushions had as well, which was convenient.

Sewing is problematic at my place. I do have an en suite washer and dryer in the condo, but even with the ventilation fan on, the dryer can take a long time. Basically I only run it when I absolutely have to, and only then on the weekends. Then pressing lengths of fabric in a small apartment can be challenging as well, just because it’s hard to figure out where to put the ironing board. Usually I use a little table-top ironing board, even if that means I need to press fabric lengths in two passes.

Then once all of that is done, there’s the cutting and the sewing to do. I am not good at sewing. Usually I specify that I’m not good at cutting, but this last session made me realise I don’t sew very well either. Also, my sewing machine chose this particular time to have the needle tension go all wonky. I should have had it set correctly already (it’s always been fine before). Instead, I had to crank it to maximum tension to get barely acceptable stitches. And then the thread kept on breaking. Argh.

Nevertheless, when all was said and done I had two cushions like the one shown above, and two furoshiki, which is how many it took to wrap the gift in its large cardboard box:

If you look closely (although I’d rather you didn’t), you’ll see both the top-stitching and the seams are crooked. Sigh. Oh well, it’s serviceable. I do like the red back fabric with the turquoise bird fabric.

I didn’t convince the cushions (four, two handmade covers, two store-bought contrasting ones) to fit in the furoshiki with the box, so I just stuffed those in a reusable shopping bag (also IKEA) and called it a day. Turns out the shopping bag came in handy for packing all the gifts into the car.

I have fabric to make myself two blouses this autumn, but the sewing machine and its tendency to break thread is making me nervous. I might have to see about getting it adjusted before I let it near the cotton voile I got.