The weird thing is, I remember enjoying wrapping gifts. I remember taking pride in getting the corner folds mitred just so. I remember feeling pleased when the edges of the wrap met precisely in the middle of the short sides, and came to a nice sharp point.
Somewhere along the line that stopped. It may have been paper that wouldn't behave, or running out of sellotape, or something, but I switched to commercially-available gift bags.
Does anyone else besides me remember when gift bags were touted as being reusable and therefore more eco-friendly, even though they were fully printed and cost a lot more than paper wrap? It rarely seems to work out that way.
At least a year ago, my mum gave me an article from Canadian Living about furoshiki — Japanese fabric gift wrap. The instructions were so simple, even I didn't need a lot of diagrams: you just find two squares of cloth (a square metre is a nice size) that complement each other, sew them together with a gap in one edge, clip the corners, turn the whole thing right side out, then topstitch the edge (and sew the turnout gap shut). You're left with a reversible, square piece of cloth. Tie up a gift or three inside the cloth and ta-da! reusable, washable wrapping paper.
Canadian Living posted a video showing a couple of ways to wrap objects in furoshiki with grace and flair. Sadly, I did not discover the video until after I took the photos below. Oh well, next time. There are a lot of resources on-line to learn more about furoshiki.
I deliberately went with non-Yule patterns so I could use them throughout the year. Your mileage may vary.
 The nieces got pink and purple furoshiki. This year, for my own sanity, I colour coded the gifts so that Niece the Elder had pink on the outside, and Niece the Younger had purple on the outside. Therefore, I can say with confidence this is a photo of Niece the Elder's pink toy racing car when it was wrapped up.
This is a small cloth, made from a couple of fat quarters which were trimmed down to squares. I used quilting-weight cotton for all of the furoshiki I made this year.
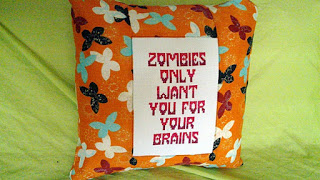
The next photo shows what I did with the trimmed off fabric of the fat quarters, and with some plain white cotton I had from the book cover I made:
 I just used a Sharpie to write on the tags, rather then embroider them. I was low on time, and I'm not sure I could have got embroidery to fit as well.
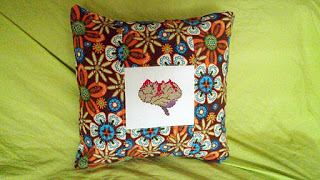
The above photo shows a furoshiki that is about a metre square. It had Sew Red, the hardcover edition of Stephen King's Doctor Sleep, and the Dear Jane quilt book in it, along with a box of 16 Ferrero Rochers on top.
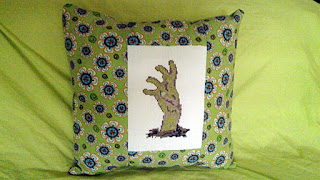
I bought the fabric before I got all of the gifts, so I wound up getting more fabric than was immediately needed. I still have two medium-ish and one large cloth left to sew up, all in the blue and green fabrics of the cloth in the last photo. It feels good to sew these, because you can actually imagine getting some use out of them. They are completely not intimidating to sew: no precise sizes to worry about, no tricky seams.
Plus, they don't rip if you tug at them to adjust a corner.
Somewhere along the line that stopped. It may have been paper that wouldn't behave, or running out of sellotape, or something, but I switched to commercially-available gift bags.
Does anyone else besides me remember when gift bags were touted as being reusable and therefore more eco-friendly, even though they were fully printed and cost a lot more than paper wrap? It rarely seems to work out that way.
At least a year ago, my mum gave me an article from Canadian Living about furoshiki — Japanese fabric gift wrap. The instructions were so simple, even I didn't need a lot of diagrams: you just find two squares of cloth (a square metre is a nice size) that complement each other, sew them together with a gap in one edge, clip the corners, turn the whole thing right side out, then topstitch the edge (and sew the turnout gap shut). You're left with a reversible, square piece of cloth. Tie up a gift or three inside the cloth and ta-da! reusable, washable wrapping paper.
Canadian Living posted a video showing a couple of ways to wrap objects in furoshiki with grace and flair. Sadly, I did not discover the video until after I took the photos below. Oh well, next time. There are a lot of resources on-line to learn more about furoshiki.
I deliberately went with non-Yule patterns so I could use them throughout the year. Your mileage may vary.
This is a small cloth, made from a couple of fat quarters which were trimmed down to squares. I used quilting-weight cotton for all of the furoshiki I made this year.
The next photo shows what I did with the trimmed off fabric of the fat quarters, and with some plain white cotton I had from the book cover I made:
The above photo shows a furoshiki that is about a metre square. It had Sew Red, the hardcover edition of Stephen King's Doctor Sleep, and the Dear Jane quilt book in it, along with a box of 16 Ferrero Rochers on top.
I bought the fabric before I got all of the gifts, so I wound up getting more fabric than was immediately needed. I still have two medium-ish and one large cloth left to sew up, all in the blue and green fabrics of the cloth in the last photo. It feels good to sew these, because you can actually imagine getting some use out of them. They are completely not intimidating to sew: no precise sizes to worry about, no tricky seams.
Plus, they don't rip if you tug at them to adjust a corner.