"crochet"

back in the saddle by Katherine Hajer

Last month I got a bit of a body blow on the crafting front. I lost my knitting bag on the subway, and it was never turned in to the lost & found.

The bag included my tools pouch, which amongst other things contained the One Perfect Tapestry Needle I'd had since I was nine years old. It came with the first needlepoint kit I ever made all by myself, and I'd been using it to sew together and darn most anything yarn-like ever since. It's hard to explain, but it was just the right size, shape, and finish to do everything from bulky sweaters to fingering-weight socks with. I would use other needles, but it was my default, and I'd used it for over half my life.

The knitting was a second pair of Space Invaders Socks I was working on for my friend Cathy, a request from her. I'd just made it past the leg and was working on the foot of the first sock, and I was already late with them.

The bag itself was a loss. It was a hand-made, hand-screen-printed promo item for Alice Hearts Welsh Zombies, a hilarious novel I picked up a couple of years ago when it was first published. The authors themselves made the bags as giveaways for when people bought two or more copies of the book.

Of course, the grown-up thing to do is chant, "They were only things, if it happened it was meant to be, you've had lots of close shaves before and it was finally your turn," but still... it's hard to get going again. Of course the day I lost the bag I was feeling physically crappy, and had had a busy day at work, and of course there was a subway weirdo near me who was being weirder than the norm and not a little scary... it was one of those perfect storm things.

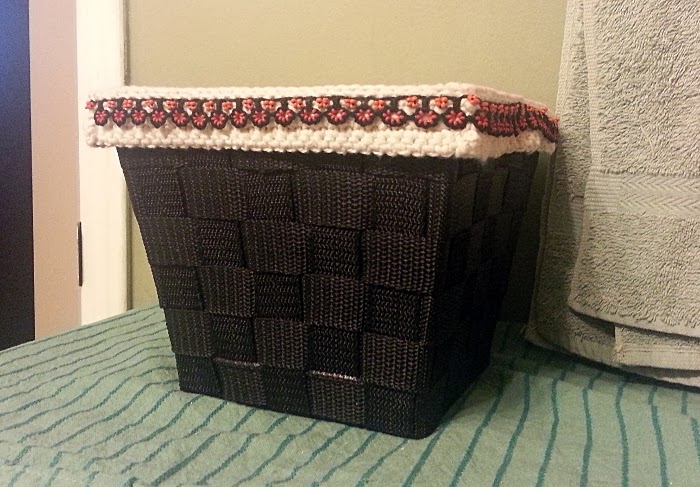
To make up for losing the Space Invaders Socks, I made Cathy this Skull Cap:

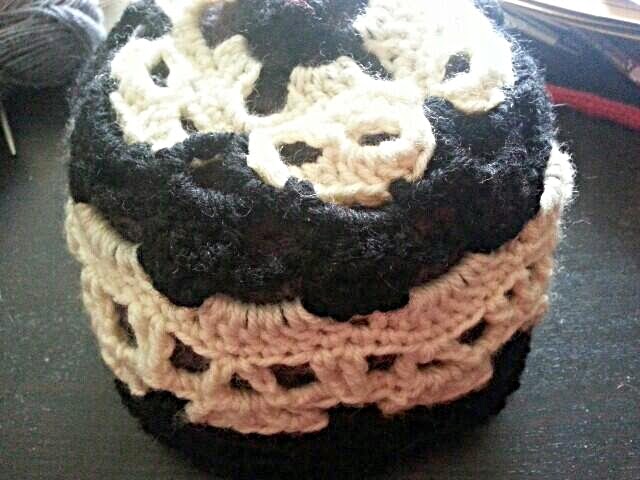
It's a free pattern that Icy Sedgwick posted to Pinterest. I added the optional lining (hard to see here) in a greyish-purple colour. Despite adding some extra rows of the black lattice pattern, the hat came out shorter than I would have liked, but Cathy says she's been wearing it, so that's what's important.

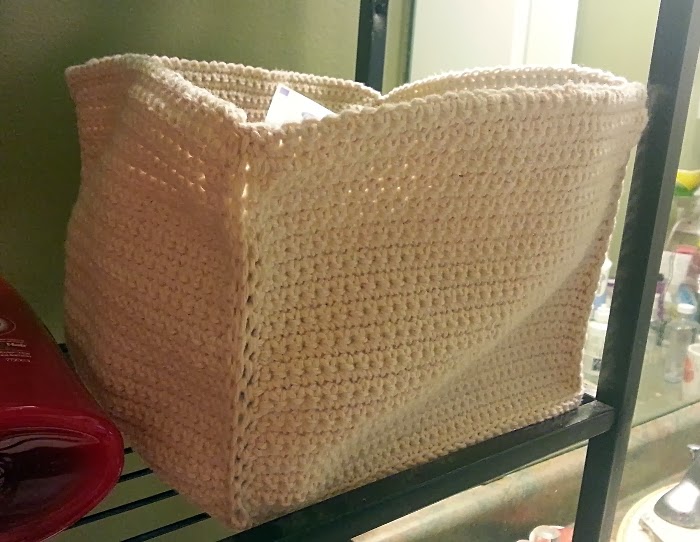
The entire hat was sourced from stash yarn and crocheted in an evening. It was exactly the kind of quick, funky project I needed to get my crafting mojo back in gear again.

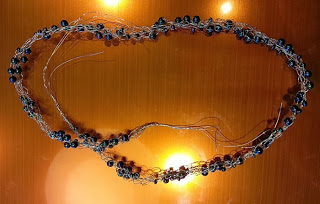
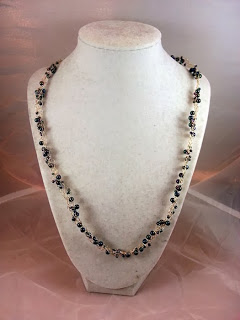
I also made (and managed to not lose) Cathy these orange spider socks:


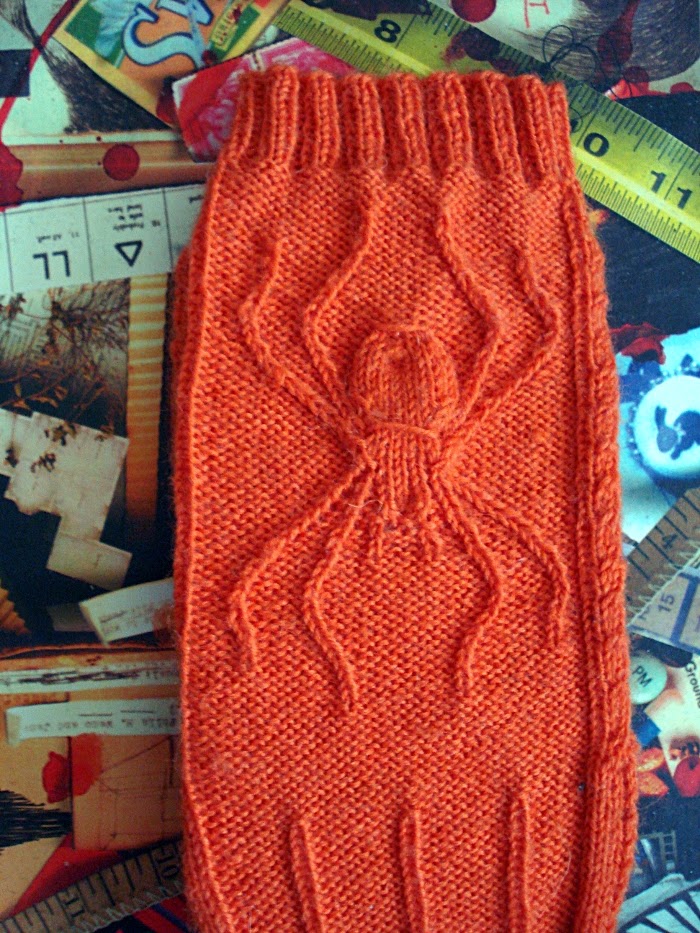
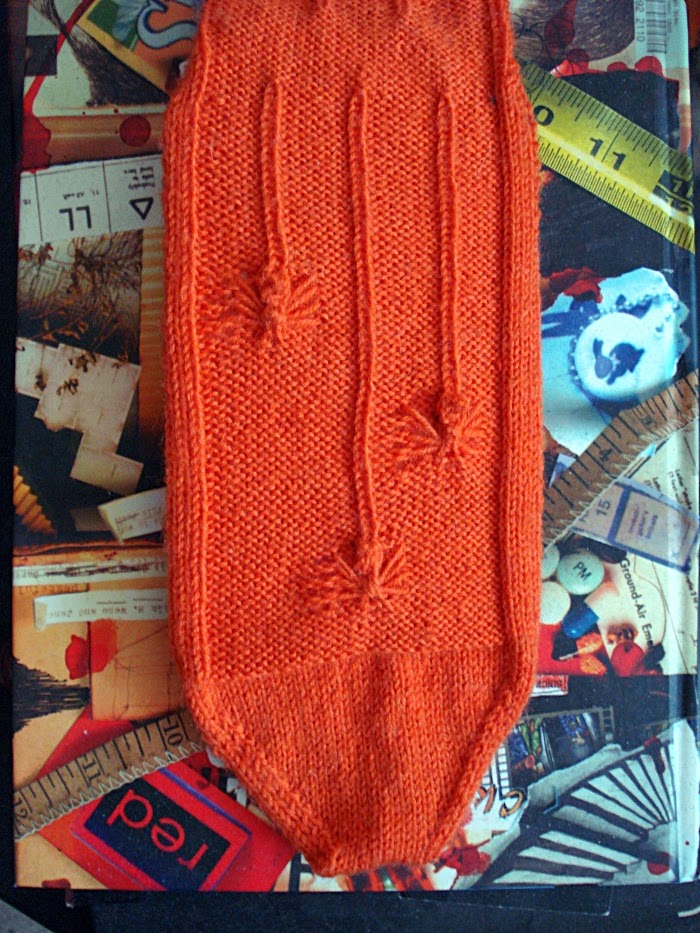
These were another free pattern from Ravelry. The instructions on these were excellent — they were a lot easier to make than they look. The only real mod I made was when I was working the little spiders, but that was just to suit my brain, not because I disagreed with the pattern per se. The finished spiders look about the same as the ones in the pattern. These have been done since before December, but I didn't want to post about them until Cathy received them.

That leaves one more thing for Cathy on the needles and one new thing on the needles for me. I'm slowly getting used to my new tools pouch. But I'm still on the lookout for a new One Perfect Tapestry Needle.


scale by Katherine Hajer

On New Year's Day I started crocheting cotton boxes for my washroom. They're part of an ongoing get-tidy project I have on the go, they are being made 100% from stash, and I'm tired of having to dust things like my makeup bag and the spare bottles of shampoo.

As I was working on the first box, I learned that I'd won a prize in a charity raffle I'd entered a few weeks before. The prize was an assortment of cosmetics, and it came in a very nice black basket woven with strap material. I decided to crochet a lid for it while I was at it. This was the result:


The lid is natural-colour, worsted-weight dishcloth cotton single crocheted with a 4.5mm hook. The beaded edging is size 11 seed beads crocheted with perle cotton on a 0.6mm hook. The basket is 19cm per side, for a total of 76cm. There are sixteen motifs per side, so sixty-four in total, plus an extra orange picot to complete the repeat. There are seven red beads and four orange beads per motif, so that's a total of 708 beads (448 red, 260 orange) just in this edging.

One of the red circular motifs is about the same size as one of the lid single crochet stitches. It's been a little weird switching back and forth between the two.

The first box is done, but I'm still working on its lid. It will have a beaded edging as well, but in a different pattern:

This has been nice, easy work (even the beaded edge, really, although its tiny black stitches get finicky). Really, though, I need to get back to the socks for Cheshin.

The box idea came from Erika Knight's Simple Crochet, and the beaded edging from Midori Nishida's The Beaded Edge.


wire crochet: the power of letting random into the mix by Katherine Hajer

Last Saturday I took a wire crochet class with Laura Sultan at the That's Women's Work art gallery. I've fiddled around with wire crochet on my own a few times, which mostly meant I'd used up a lot of wire and got nowhere.

During the class we learned how to make a wire and bead necklace using one of my favourite design approaches: something that is more complex when finished than it was to actually make. It's one of the best things about DIY — a dollop at randomness at just the right time in the process creates something that's both unique and aesthetically pleasing. Basically, you give up total control and let the universe have a hand. That's something that factory-made jewelry, clothes, and other items are never able to replicate, and it's why DIY is still so important in a factory-transformed world.

All right, so what did we do? We learned how to chain stitch wire with beads, and then weave strands of beaded chains together to create necklaces. At the end of the class, my strands looked like this:


I finished the ends with short lengths of chain and a clasp at home, which created this finished version:
The really cool part (besides learning something new) was that everyone else's work used different beads and different coloured wire, and in each instance it totally transformed the work. It's similar to what happens in knitting when Kaffe Fassett's Persian Poppies "rules" get worked in different colourways.

Besides getting to see how dramatically different one construction method looks with different materials combinations, the class structure gave us a lot of time to talk about different ways to work with the technique, the effects of different colourways, and other things which are essential to jewelry design, but often get lost in classes because all the attention is being focused on the working, not the designing.

We got spoilt with tea and fancy baked goods, and in the second half with wine. It was a very full two hours in more ways than one!

Laura teaches this class, classes on chain maille, and others on a regular basis. Check out her Meetup group for details.

another success for Knit that Shit! by Katherine Hajer

Right now I'm supposed to be finishing socks for myself and starting socks for others (Yule presents). Right now I'm supposed to be working on three different sewing projects, including one that's so close to being done that I could probably grab a needle and thread and have it finished in an evening if I got right down to it. Right now I'm supposed to be organising my jewelry-making stuff, which is already 80% of the way there.

Which, of course, is precisely why I went ahead and finished this instead:

This is the Doris Daymat Mark II, and it is a Knit that Shit item. This is in itself a nice little accomplishment... I just wish it made an appreciable reduction in the amount of things I have on the go!

The original Doris Daymat looked like this:
I like the flower mix and placement on the second mat better. The second mat, like the first one, will be used in front of the vanity in my washroom.

The first mat still looks great, but it's nice that I'll have two for when one is in the wash.

Last time I blogged, I said I'd likely have the Space Invaders socks done next. Instead it's this. Maybe next time. I'll have to surprise myself.

rendered by Katherine Hajer

The crocheted squares blanket is done! Not bad, considering I started on 20 May and finished last night (15 June). Here's the photographic proof, and some statistics to go with it:
  • About 1,660g of yarn went towards the blanket, 400g of which I bought especially for the project (because I needed the colours to balance out the scheme). 
  • The final blanket weighs 1,452g
  • I still have 182g of leftover yarn. That sounds like a lot, but it's all in small balls of stuff that's good for embroidery or waste yarn, and not much else. I was surprised it weighed that much.
So that makes... 53g of ends that just got tossed for lack of anything to do with them.

Assembly:
I worked the blocks in vertical strips, starting with the centre one. I added two blocks extra in length to the original blanket size, but kept the same number of blocks in width. Originally I'd wanted to make it two blocks wider as well, but I would have run out of yarn. Instead, I opted for a wider-than-pattern border that added about another block's worth of width and length.

Finishing:
  • Each block had its ends darned in before it was added to its respective strip.
  • Blocks were always added as they were made.
  • Blocks were slip stitched together using black yarn (a small nod to the Kaffe Fassett/Liza Prior Lucy quilt this blanket's pattern resembles, which was backed with thin black fabric and no batting)
  • For the small blocks, I slip stitched them horizontally first, just attaching them to the previous blocks in the strip. Once a run of small blocks was attached, I did a single vertical seam to connect them all.
  • Ends from seams were darned in once the seam was joined to another seam. The last ends at the outer edge of the blanket were done once the first round of the edging was done. So there was no angst-ridden "I have all these ends to finish!" moment.
The edging mostly alternated between single crochet and double crochet rounds, until I got near the end and started running out of yarn. The last two rounds were one round of double crochet, then one round of single crochet. I'd saved a 100g ball of yarn especially to do this with, and it took almost all of the ball to finish the rounds.

Overall, I'm pleased with how it turned out, especially in terms of its size and dimensions. It makes a great blanket for the sofa. I'm still not sure it's not ugly, but I am sure it could have been uglier.


crochet as decluttering by Katherine Hajer

We just had a long weekend in Canada, which means I did some decluttering. Some of this was pretty basic, along the lines of "if you can't stand seeing it there and there's nowhere else to put it, throw it out." Some of it required another level of thinking:


Like a lot of DIYers, I have a stash problem. I have tons of excuses for it: I used to live in a much bigger apartment where I had an entire room devoted to stash, I inherited stash from two different people, yarn is the one thing besides books I will go shopping for when I'm stressed out... the point is, I have too much damn yarn. I have a sixty-square-metre apartment now, and there is yarn in every single room except the kitchen and washroom.

And there used to be yarn in the kitchen (in the freezer, if you were wondering).

The need to transform yarn into finished objects inspired the Knit that Shit meta-project, which after a brief winter hiatus is ramping up again for the 2013 session. I can envision a day when KTS is a seasonal competitive activity, sort of a marathon version of the Ravelympics, but it's not there yet.

I treat KTS like a giant game of Flux, changing the rules as real life and my own whims intervene. So long as the overall direction is towards finishing the projects and clearing out the excess stash, I'm okay.

The end-goal is to have all the stash yarn fit into the cedar-lined blanket box I inherited from the grandmother who taught me how to knit, with one (one!) WIP basket beside the couch.

I'm years from that. Instead, I'm running Knit that Shit with the current Flux rule that I'm allowed to start a new project if, and only if, it is mostly using up stash yarn. I can buy new yarn to complete the project, but it has to result in a net loss of stash.

Hence the striped squares blanket project:
It's using up ten skeins of various acrylic how'd-that-get-there, plus I bought four more to balance off the colour scheme. Well, that and I want to make the blanket bigger than what the Patons pattern (login required to download, but free) I'm following said to do.

So far I'm about 20% done. Not bad. It will feel good to have it finished.

This is the first time I've worked in acrylic for a while. I acknowledge that sometimes acrylic is the best way to go for some things, but more and more even the nice acrylic squicks me out. The price of acrylic has gone up with the price of oil, but the price of wool has been holding pretty steady and is a comparative bargain again, even for the good stuff.

This blanket will be fine to keep in the living room for when I get a chill when I'm sitting on the couch. But I don't think I'd work a large piece in acrylic again.

and so it begins by Katherine Hajer

When the film Julie & Julia came out, some of my friends were very insistent that I see it.

"It'll be inspiring," they said.

"It'll give you confidence you can be published," they said.

Instead I sat through a film that was all about getting published thanks to an almost always-supportive husband (which I don't have), and thanks to a blog written in 2002 (which I didn't have, and it's not 2002 anymore). Although I thought Julie Powell's Project was super-cool, it was pretty depressing as far as "inspiring" films go.

But since Nora Ephron passed away recently, it reminded me that I always wanted to give the Julie and Julia book a go, so I read it this past weekend.

And it was still depressing, for much the same reasons.

But, because I finished these socks during the same weekend, it gave me an idea for a Project of my own. So I went around the apartment, gathered all the stuff I already had on the needles (or hook), and made a blog page, and a title.

I called it Knit That Shit (and Crochet, Too!). The goal is to get all the stuff in the photos done before 1 January 2013. So I have almost exactly six months to finish the fourteen projects I already have on the go. I also have beading and sewing stuff to do, but those will be kind of... bonus things.

Usually I keep my posts pretty G-rated (but not always), but it was the only catchy thing I could think of that had the appropriate attitude. Besides, it goes with the whole Julie & Julia aesthetic.

If I'm going to make this work, I'm going to have to check in once a week day and whenever I finish something. I doubt very much this will lead to a book deal, but it will definitely lead to a tidier apartment, and I'm all for that.

Stay tuned.

how to fight back when things suck by Katherine Hajer

I've been trying not to whine about it too much on-line, but since the last week of this April I've been having problems with my shoulders and upper back (hence the long gap between blog posts, amongst other things). Since I'm not very good at just lying down and watching TV, I got bored very quickly, despite the pain. As soon as things started getting better, I was looking for ways to make stuff without disobeying my chiropractor and sabotaging the healing process, but which would help me from getting stir-crazy as well.

The main problem is in my left shoulder, which is the "power source" when I'm knitting, so that's been out until recently. I crochet right-handed, though, and I knew I could do that whilst reclining to support my neck and head, so I tried that.

I've been learning all sorts of things.

The first thing was that I need to learn to adjust crochet patterns the way I do knitting patterns. I made this lace cardigan:

There was something out of whack about the original sleeve length. I have longer-than-normal arms, but the original arm length went well past my knuckles (and yes, I was getting the right gauge). I took out two rounds of shells — almost three inches —to fix that. The waist/peplum is in the wrong place (see how the bottom three rows of shells run in the opposite direction?), but since I plan to wear is just buttoned at the bust, that's okay. The button, incidentally, replaces the ribbon closures called for in the pattern. It's still girly and less of a pain to take on and off.

I wanted a non-jacket that would let me look pulled together when it was wiltingly hot outside, and I think this fits the bill nicely. The yarn, incidentally, is Patons Grace mercerised cotton fingering weight, and since most of the stitches are trebles it worked up quickly.

I also learned a form of bead crochet:

My mum gave me the multicoloured pendant bead a while ago, and I had this idea of putting it on a spiral rope for a while though. For some reason I have a hard time stitching spiral ropes. I'm not sure what I'm doing wrong with the stitching part, but this loop crochet method works up faster and is easier to work. It's hard to see in the photo because the seed beads are black, but the results are similar to a Russian spiral. Each loop has four size 11 seed beads and one 4mm coloured bead. I arranged thing so that the blue and green beads alternated in one spiral path, and the red and orange beads in another. The pendant had its loop and fringe added while it was still separate from the main necklace rope, and the peyote stitch loop has to be that big to accommodate the pendant.

This is one case where I really like having the pendant at the front, although of course it could be worn "backwards" with just the rope part showing in front and the pendant hanging down the back, too.

I'm really inspired by this beaded crochet stitch. I've even got two more things on the go using the same stitch — all to be made in a reclining posture, of course.

a way east easter by Katherine Hajer

I have two nieces. On Easter the eldest one was two and a half years old, and the youngest one was three weeks. So neither of them are into chocolate much yet.

I got told to buy them picture-books, which was perfectly cool by me, but picture-books look so lonely in a gift bag. The stupid bag keeps collapsing.

Then I remembered this Chinese zodiac amigurumi set of patterns that knit.1 magazine published a while back. It's now a free pattern to download (that's where the link goes to). I took the Year of the Rabbit pattern and Eastered it up into two dolls, one for each niece. The only mods necessary were to embroider the faces instead of using the recommended buttons, and to add the neck ribbon/flower to make them look more seasonal. The flower petals are tacked down so that little fingers can't pull them off.


I used dishcloth cotton for the bodies and neck decoration, and the faces are embroidered with cotton floss. I wanted something that wouldn't taste/feel yucky if a little one decided to teethe on an ear or an arm, and to make them more washable.

They were quick and unfussy to make, good TV crocheting, and I got a kick out of using a Japanese crochet aesthetic to appropriate a Chinese zodiac symbol for a European holiday.